Firmware
Try the new CONFIG Tool
⩭
Try the new CONFIG Tool ⩭

We’ve redesigned the CHOMPI Configurator Tool to make updating firmware and customizing your preferences easier than ever.
CHOMPI uses its micro SD card to manage firmware updates.

CHOMPI: TAPE Firmware Version 2.0
TAPE 2.0 is an update to the signature CHOMPI workflow. It includes various bug fixes and performance refinements, as well as expanded configuration options.
Download Factory Card Profile
Released: November 2025

CHOMPI: TEMPO Firmware Version 1.0
TEMPO is a brand new instrument that reimagines CHOMPI as an intuitive groovebox: A hands-on way to make syncable patterns and rhythms. Familiar controls... with a totally new workflow!
Download Factory Card Profile
Released: March 2026
-
CHOMPI TEMPO v1.0 Firmware Updates:
A totally redesigned Playback Engine that runs directly from the internal memory
A completely new FX Engine — combining dual clock-synced delays, each with unique randomization probabilities, buffer freezing, side-chain feedback, and send/mix controls.
An intuitive Pattern Generator with note probability, rest patterns, and arpeggiator modes that can be applied independently per engine.
A brand-new Slice Engine, for rhythmic/percussive sample chopping and clock-synced dissection.
Explicit Preset Saving — allows for snap-back recall, even after parameters have been adjusted.
Quick Save Snap Shots — Dual instant save states containing every parameter across the entire device… perfect for live performance, quick A/B recall when comparing a new idea, seamless transitions between compositions, and more ;)
The TEMPO MIDI workflow has a strong emphasis on clock synchronization and interfacing with other external devices.escription
-
CHOMPI TAPE v2.0 Firmware Updates:
Overhaul & Refinements to CHOMPI’s power and battery charging systems
Significantly more robust battery charging protocol
Auto switching to USB-C power mode when a low battery or charging error is recognized
15sec timer (all LED’s flashing yellow) when low battery threshold is reached
Quickly connect USB-C power cable to rescue a low-batt shut down
New User Config Option = Split Delay <&> Reverb
Toggling this setting on CHOMPI’s options.json file will separate the combo Delay/Reverb into two separate FX
When FX split is enabled, the controls will be updated to the following:
Noon = NO Effect
Left = Delay (Green LED)
Right = Reverb (Blue LED)
Shift + Enc Turn = Delay Time and Reverb Size
Refined Tape Stability FX (Flutter/Chorus) to accommodate for a wider range of applications
Updates and improvements to the Midi Engines
Midi CC OUT now sent on all knobs/pages (see midi map for CC’s)
Midi Notes IN now across 4 octaves (adding two more oct on the lower ranges)
Midi Notes IN will continue to play in the “background” while Shift key is held down
Fixed a mismatch bug related to Midi Notes sending and receiving one Octave apart
Refined Input Gain Staging for both sampling and looper engines (cleaner, more accurate sample recording)
Updated the bootup oscillator wave to a dual triangle (NES video game flute vibes)
Multiple backend bug fixes and engine optimization / refinement for an overall more stable hardware platform
To update your firmware we recommend using our CHOMPI CONFIG Tool.
All CHOMPI users have free access to alternate firmwares, and you can swap between them by changing out the files on the microSD card. CHOMPI will simply detect the new firmware on the SD card and automatically load it on boot-up.

-
Carefully remove the micro SD card from the slot located on the right side of the rear panel (next to the handle)
TIP : The slot is designed with a round hole in the center that nicely fits a 3.5mm cable end, ballpoint pen or something similar. The card is spring loaded so watch for any flying SD cards ;)

-
Using a standard micro SD card adapter, load the card onto your computer just like any other external hard drive or storage device.

-
Move the old firmware and all files from the SD card into the trash of your computer.
This is a good time to back up your current sample files as well.
TIP : Remember to “empty the trash” of your computer before moving to the next step

-
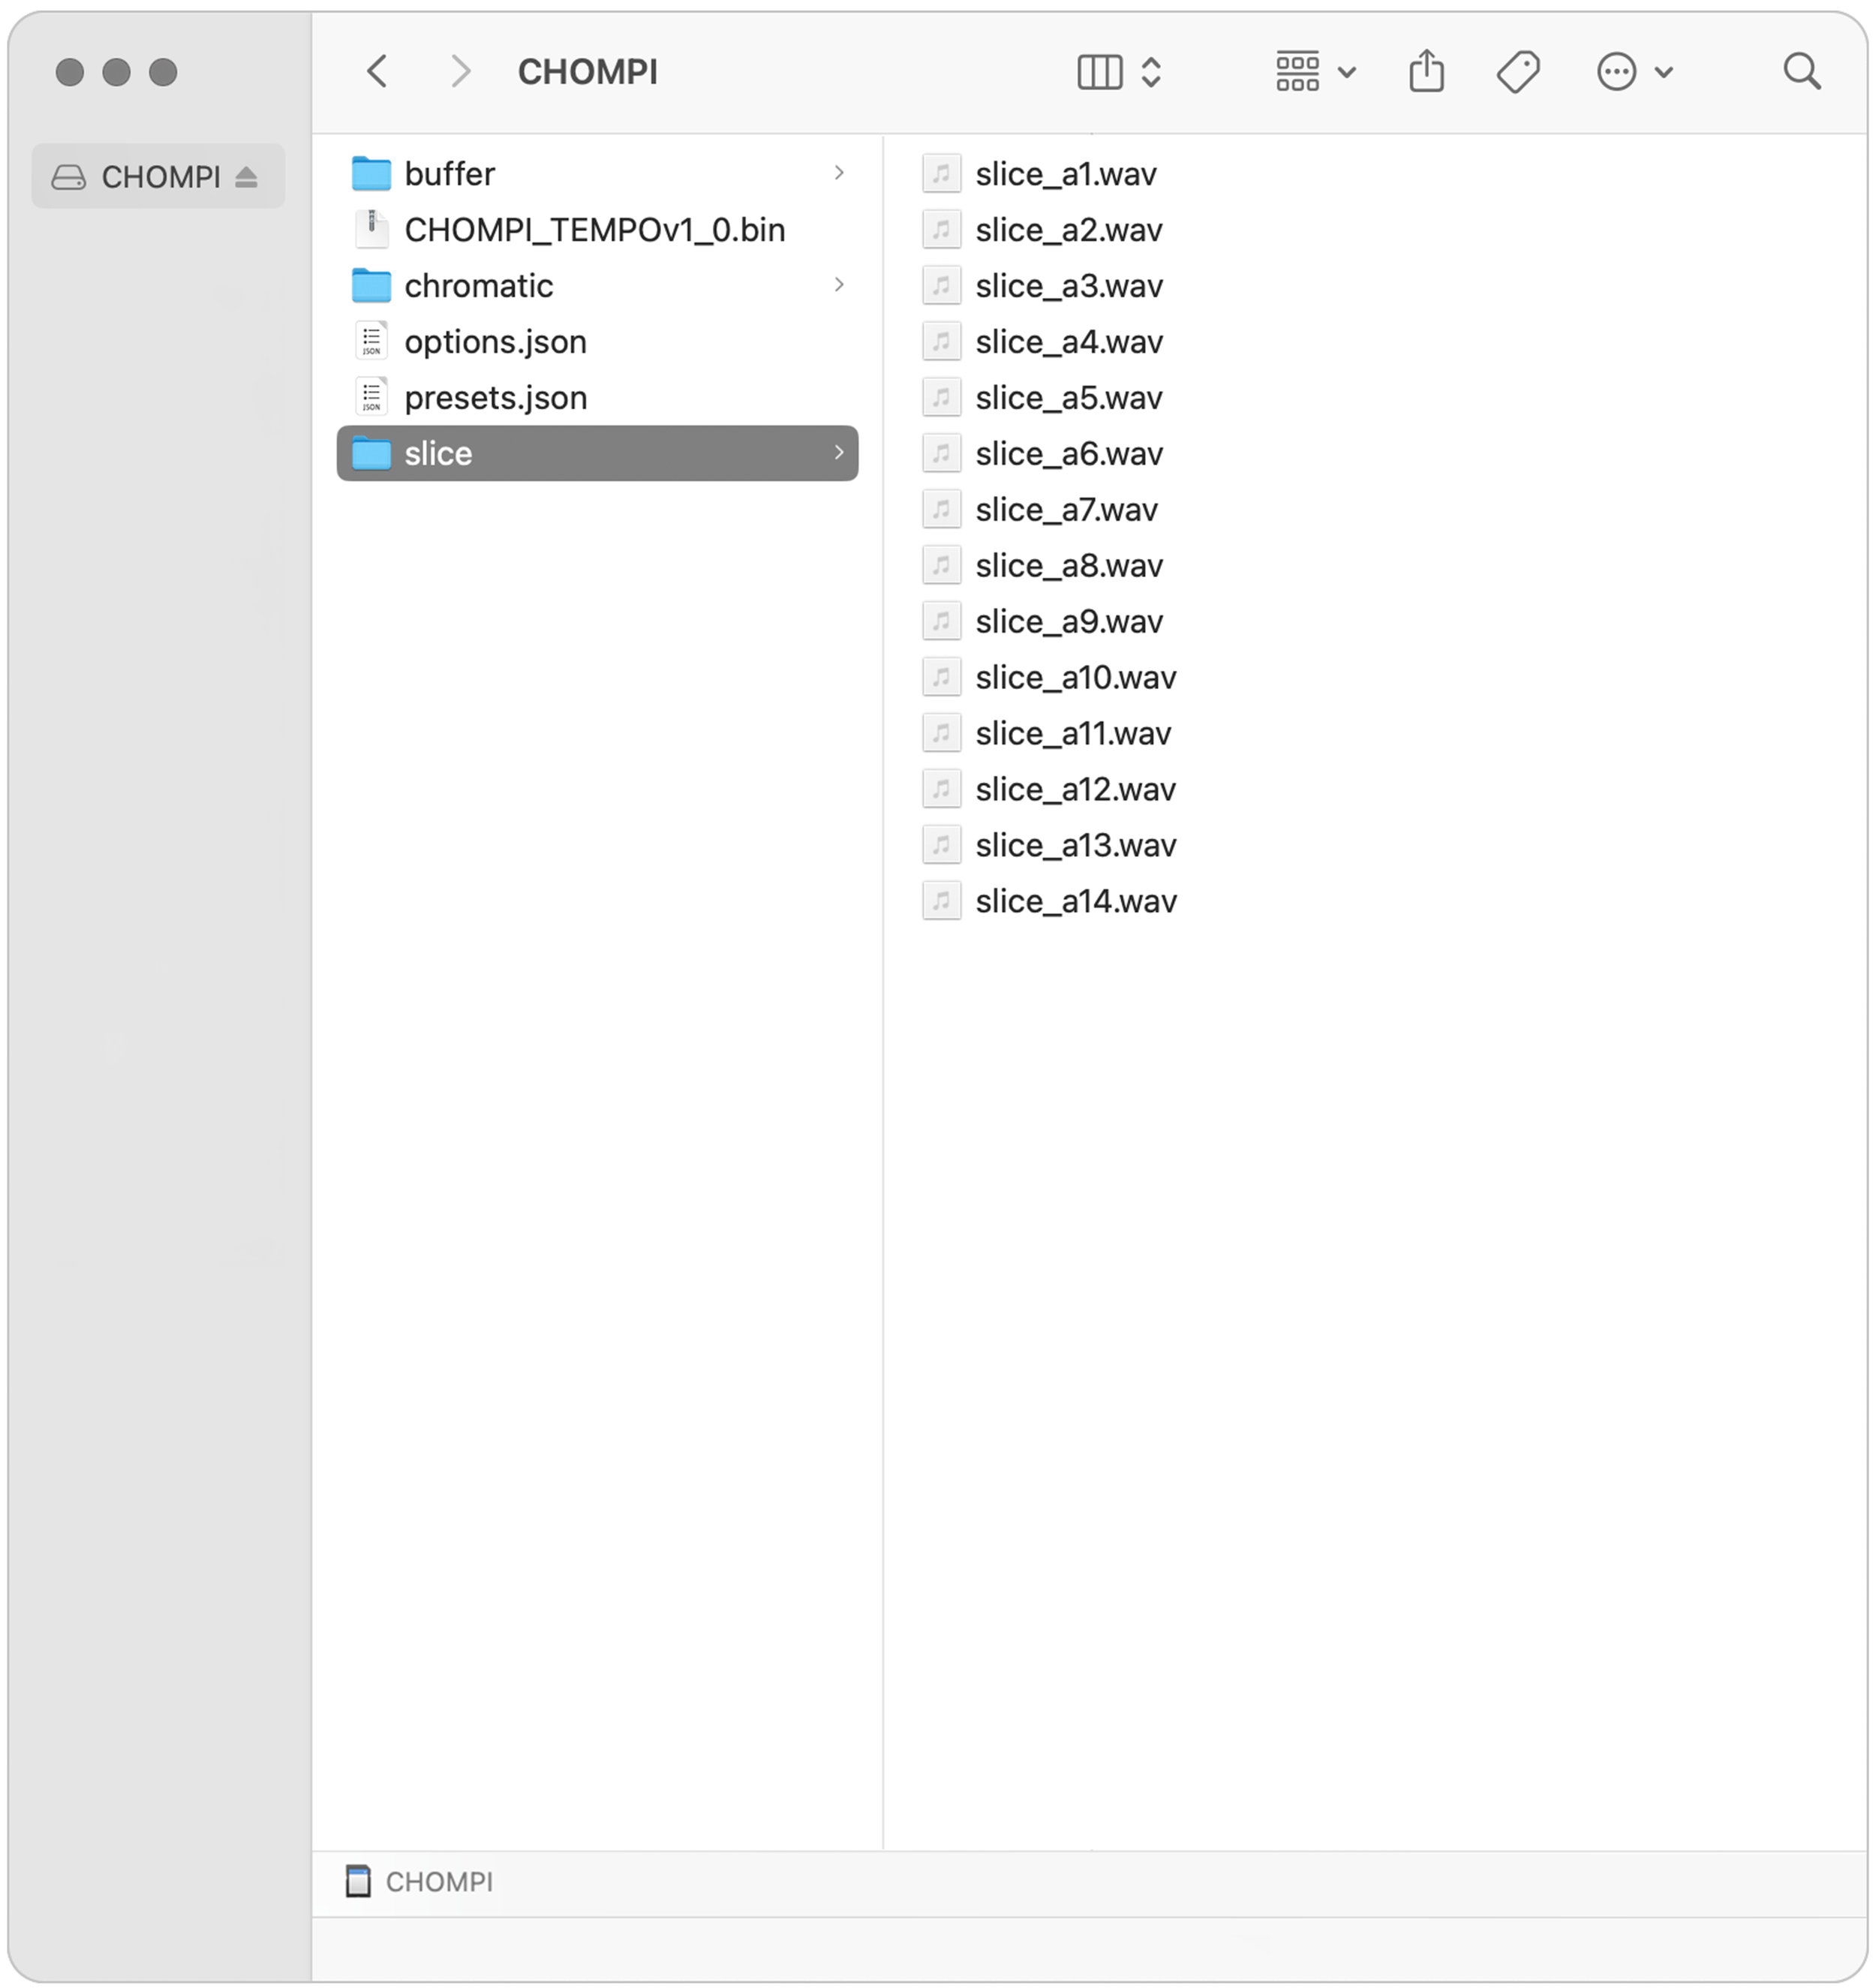
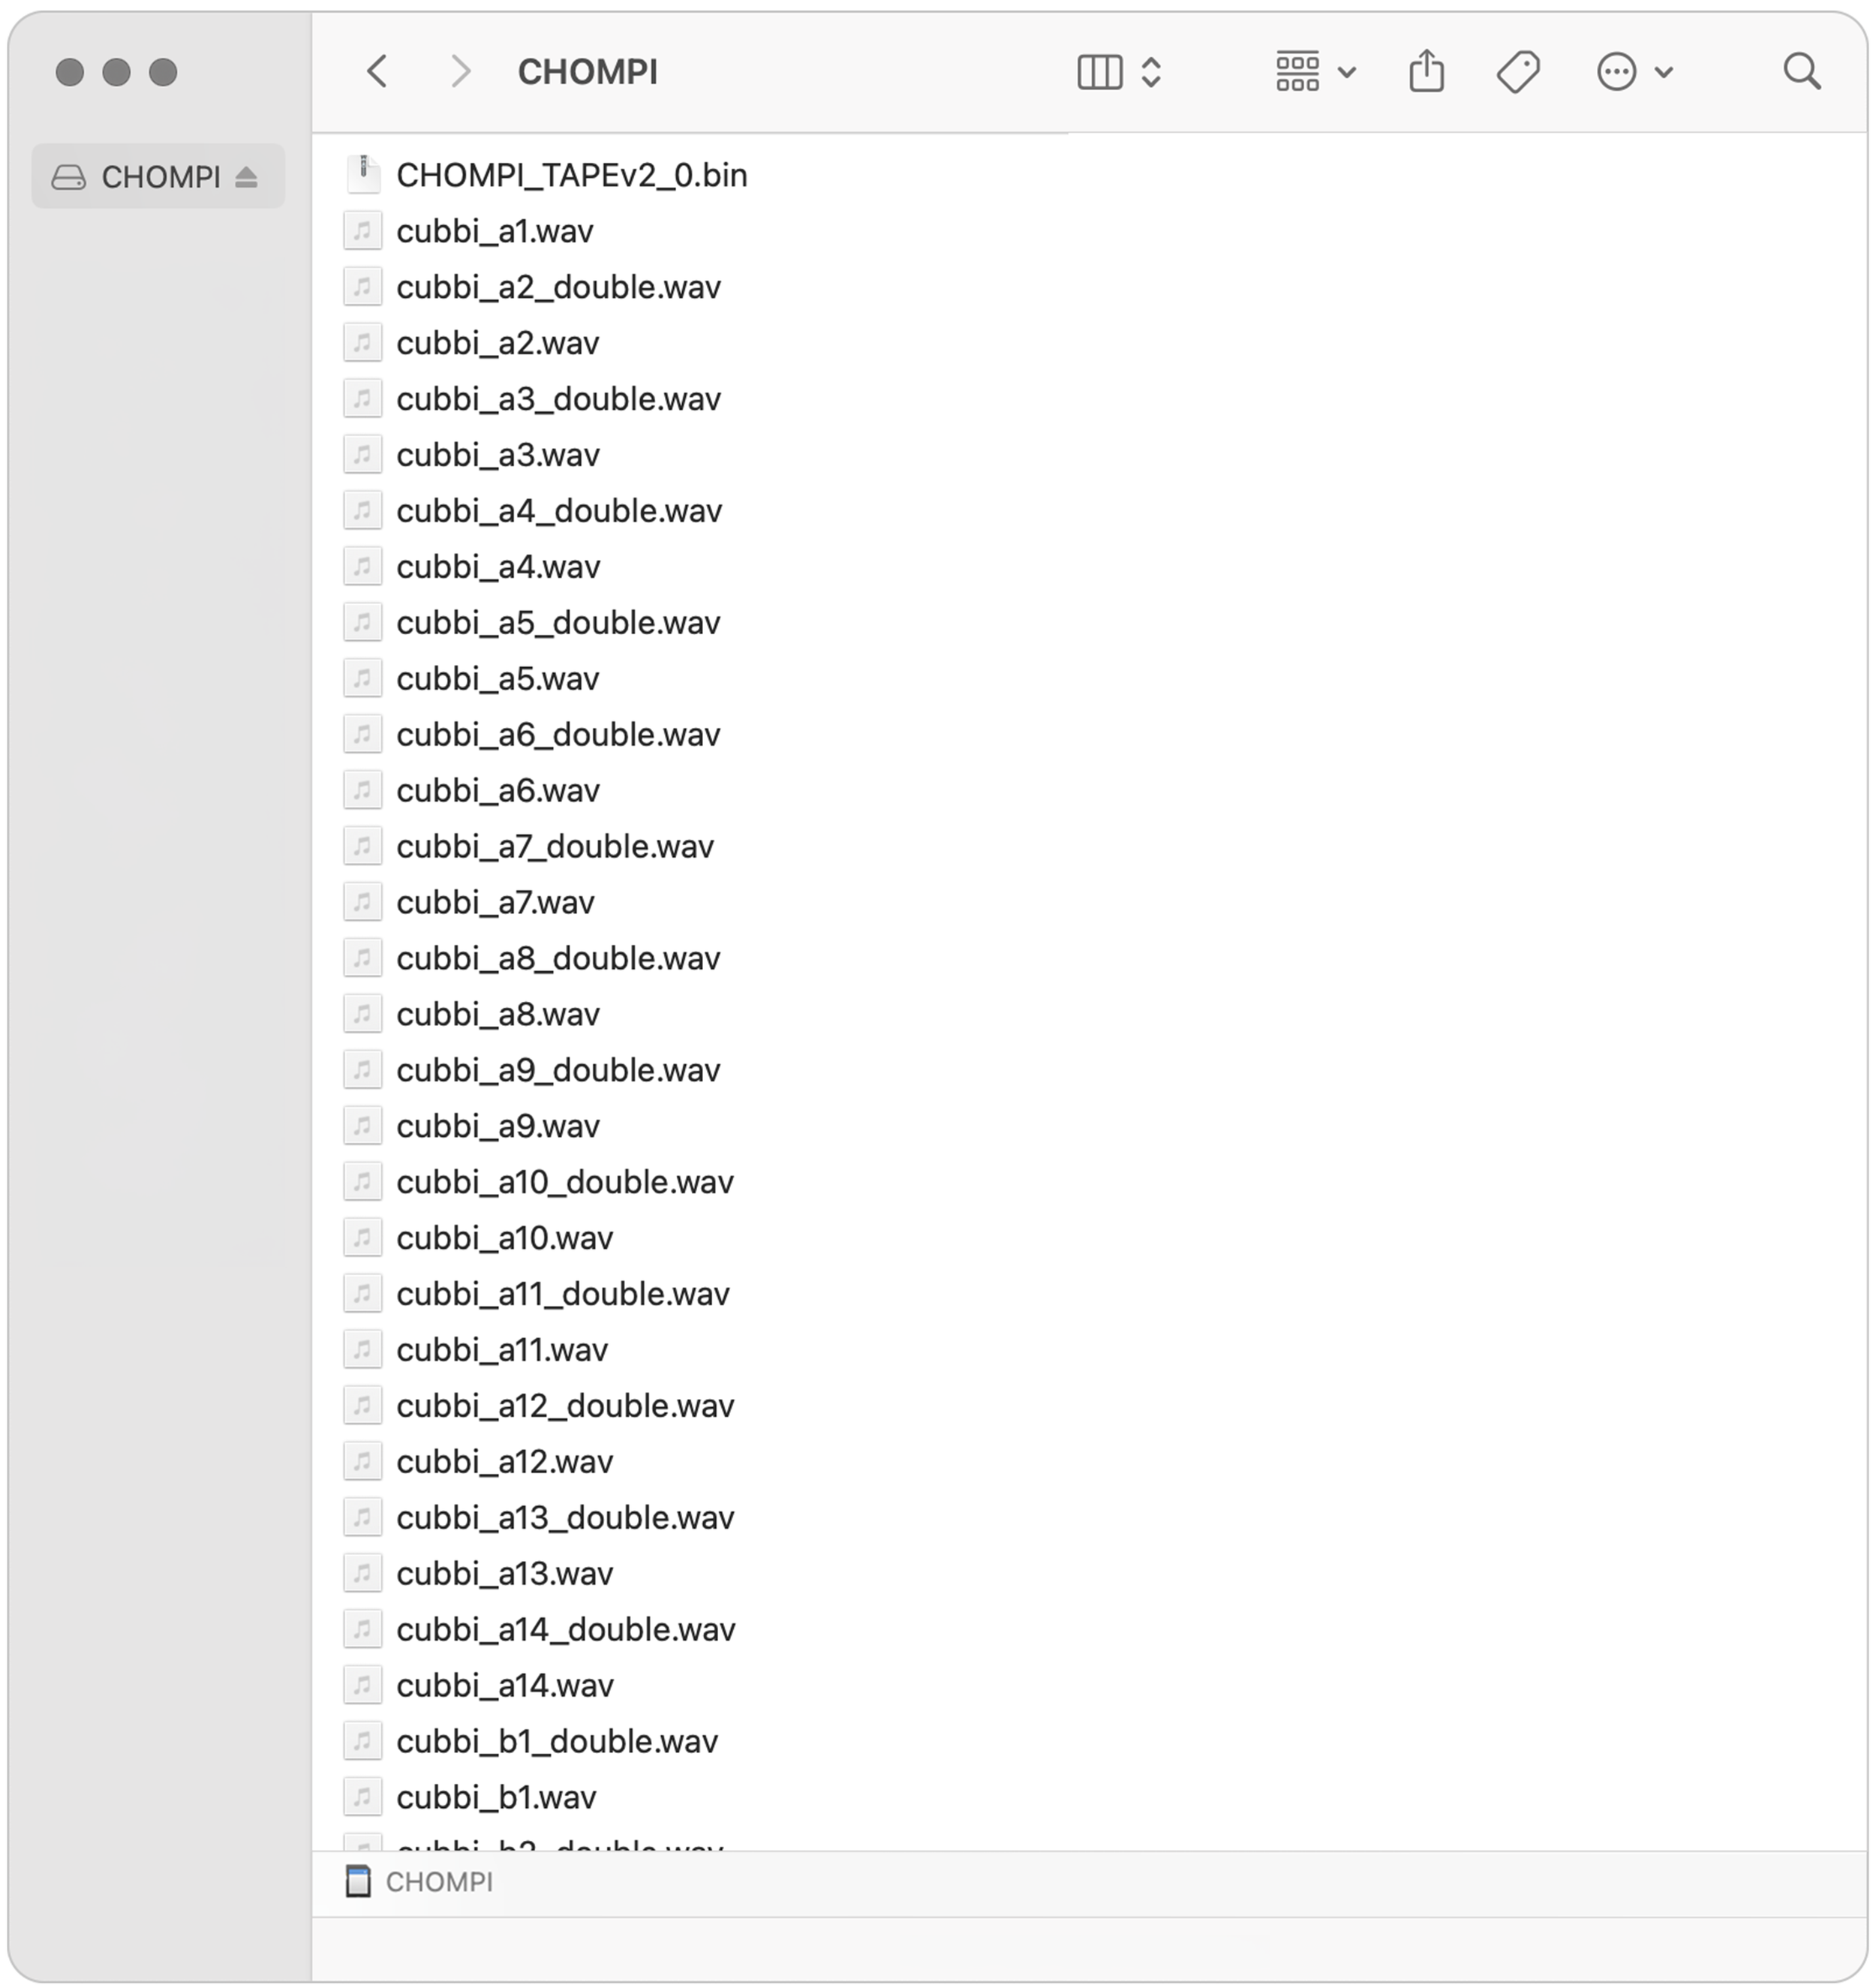
Move / copy the new firmware and exact files that you wish to use with CHOMPI onto the root directory of the SD card. Note that TAPE and TEMPO have different file / folder architectures. See the FAQ’s for more info and visual examples.
TIP : Be sure there are no duplicate files.

-
Choose the Eject command to properly eject the Micro SD Card from your computer, and remove from the adapter.

-
Carefully place the Micro SD card back into CHOMPI.
TIP: Due to the way the panel enclosure is designed, it is possible to miss the card slot and drop your SD card into the enclosure. If this happens, simply unscrew one the long narrow front panel and shake the SD card out.

-
We recommend plugging in CHOMPI to a USB power source for this next part.
Flip the power switch towards the lightning bolt icon to boot up CHOMPI. Wait for the LED animation to complete.
Note : Every time CHOMPI boots up, it checks the SD Card to verify the firmware. If it recognizes a new firmware file, it will automatically launch the firmware updater (this is indicated by the first LED “glowing” animation on bootup).
Typically, this process should only take 15-30 seconds. Once you see the “rainbow” animation on the LED’s, you should be good to go!
Firmware FAQs
Can I just swap the .bin firmware files for TAPE vs TEMPO?
-
TAPE and TEMPO have different firmware architecture a need to have a different folder structure on the Micro SD card. See SD Card images for examples.
Will my original samples still work on TEMPO?
-
In TEMPO, the sample playback engine runs directly from the internal memory, making recall and slicing faster and more responsive. The max sample length is 10-seconds (16bit 48khz Stereo .WAV files).
In TAPE, the sample playback engine reads and recalls from the SD card so sample length is variable, and can be much longer.
Can both firmwares live on one SD card?
-
CHOMPI can only run one firmware at a time. TAPE and TEMPO are distinct instruments and must to be loaded separately / one at a time on the Micro SD card.
The easiest and fastest way to switch back and forth between the two is to have a dedicated SD card for each firmware – one for TAPE and one for TEMPO. You can set each one up the way you like and swap back and forth quickly. We recommend using SanDisk brand microSD cards (no larger than 32GB).
-
If CHOMPI does not recognize the SD card when it boots up, the upper row of LEDs will blink RED. If this happens, power off the device, re-insert the SD card and try again.
Once CHOMPI’s firmware has been updated, feel free to manage or add new samples on your SD card. If you would like to customize your user options, feel free to generate a new options.json through the CONFIG Tool.
-
If you would like to start fresh with firmware, samples, options, and preset settings as they come on new CHOMPI’s, feel free to download the TAPE 2.0 Card Profile or TEMPO 1.0 Card Profile. These profile include a wide range of samples and will take CHOMPI a little bit of time to load the first time you boot-up. Please allow a few minutes for the process to complete. If you are still waiting after 5 minutes, feel free to power cycle the device. Remember, all contents of the card profile must go on root folder of the SD card (no duplicate files).
TAPE 2.0 CARD PROFILE » -
SD Card Format: MS-DOS (FAT 32)
Sample Format: 16 bit 48kHz Stereo .WAV files
Recommended SD Card Type: SanDisk brand microSD cards (no larger than 32GB)
-
Examples:
cubbi_a1.wav or jammi_a1.wav1. Type: “jammi” or “cubbi”
Determines the type of sample (chromatic or one-shot)
2. Bank: A, B, C, D, or E
(Banks D and E available on firmware 1.1 or newer)
3. Sample Slot #1-14
-
Examples:
chroma_a1.wav or slice_a1.wav1. Type: “chroma” or “slice”
Determines the type of sample (chromatic or sliced)
2. Bank: A
TEMPO has 1 bank of samples per engine.
3. Sample Slot #1-14